Your shopping cart is empty.
The DIY liquid - What you need to know
What is e-liquid DIY?
The term DIY stands for "Do It Yourself", which could be translated as "Do It Yourself". This word is often seen in many different fields; in cooking, music, sewing or decoration. This current trend of homemade craftsmanship seems to find its essence in the desire to accomplish one's own objects.
En toute logique, la cigarette électronique n’est pas passée au travers des filets de cette mode, avec la possibilité de fabriquer soi-même ses e-liquides. Cette technique DIY permet au vapoteur de choisir et surtout de doser à sa guise les arômes, le ratio PG/VG souhaité ainsi que le dosage en nicotine. Avant toute chose, le liquide DIY est davantage destiné aux vapoteurs ayant d’ores et déjà des connaissances dans la composition des éléments. Pour ceux qui se questionnent sur l’intérêt de consacrer du temps à cette création home made plutôt que de choisir la facilité des e-liquides prêts à l’emploi, deux arguments de taille peuvent vous convaincre :
The pleasure of creating your own e-liquid
What could be more satisfying than to consume a product of which you are the creator? You will always prefer a homemade pastry than a cake bought in a supermarket, just as offering one of your paintings will always be more impactful than a decoration acquired in a store. Well it's the same thing with an e-liquid! The one you've made will have more flavor than an e-liquid bought ready-made online.
The e liquid DIY will also allow you to experience all the unimaginable fragrances in an unlimited way, with your own dosages. You will be able to indulge your wildest desires, and find THE mix that will satisfy your taste buds and the completion of your weaning.
The low cost of e-liquid DIY
The portfolio argument is often a winning argument. And this is the case with DIY e-liquids, which have a much more advantageous price than ready-to-use e-liquids. As an example, the price for a 100 ml base and a flavor is equivalent to the price of a 10 ml bottle of liquid. It is thus a nice way to vaporize while making significant savings.
The components of a successful DIY
Pour créer votre e-liquide dans les règles de l’art, il est important de bien considérer les éléments inhérents à chaque mélange.



1. A base
Each e-liquid has a base, with or without nicotine, with a precise PG/VG ratio. As a reminder, propylene glycol (PG) favours the hit and the rendering of flavours, while vegetable glycerine (VG) favours the vapour density while softening the liquid. This base is the most important element of the e-liquid since it represents 90% of the composition. On average, the most common dosages are around 50% PG and 50% VG. This optimal ratio can vary according to the aspirations of each one, free to you to test several dosages to discover your preferences.
By measuring the stickiness ratio yourself as close as possible to your needs, the results obtained can be infinitely varied.
2. Nicotine
The choice of whether or not to include nicotine in its base is important since it will have a determining role on the result obtained. Reputed for its addictive aspect, nicotine is also responsible for the sensation of the hit in the throat. The higher the nicotine dosage, the stronger the hit will be.
Le dosage optimal en nicotine de votre e-liquide est fixé entre 0 et 18 mg/ml. Mais tout dépend de votre dépendance et de l’évolution de votre sevrage. Pour faire le bon choix en termes de taux de nicotine, nous vous invitons à consulter notre page dédiée. Les moins dépendants pourront bien évidemment produire un e-liquide sans aucune trace de nicotine, c’est d’ailleurs plutôt recommandé.
3. The aromas
For your e-liquid to have an enchanting scent, the choice of flavour is crucial to transforming your spray into a pleasurable experience for you and your taste buds. The online offer in terms of aromas is abundant and allows you to satisfy all your desires. Tobacco, fruity, floral or gourmet, each vaporizer will be able to find the fragrance that best suits their taste.
It is extremely important not to consume the aromas without the base, but always as a complement. In the absence of a base, you will prevent your e-cigarette to work and also risk greatly damaging your equipment.
4. Additives
Flavours can be supplemented with additives whose role is to attenuate certain sweet or bitter notes, or to accentuate the perception of nicotine. However, be careful not to have too heavy a hand when adding, as the additive is relatively powerful. For example, 3 drops are more than enough for 1 ml of liquid.
5. Accessories
Any self-respecting apprentice chemist must have the right equipment. In addition to your base and the aroma, it is necessary to acquire two accessories: empty vials and a graduated pipette or syringe. The vials will allow you to keep your designed mixtures and the graduated pipette or syringe will be responsible for pouring your e-liquid cleanly into its new vial with the desired dosage.
Don't forget to bring protective gloves and goggles. The products are toxic and must not come into contact with your skin under any circumstances.
How do you make your e-liquid?
On l’a vu, créer soi-même son e-liquide possède bien des avantages, autant en termes de tarif que de déclinaisons illimitées en saveurs et dosages. Mais alors comment procéder pour fabriquer parfaitement son e-liquide DIY ?
The step-by-step manufacturing of your e-liquid DIY
You have decided to create your own e-liquid, it's a relevant decision! Once you have made this choice, get your small chemist's equipment and components. Are you ready? Let's get started!
First step: the creation of the e-liquid
First, protect yourself well with goggles and gloves, then put everything you need on a clean work surface. Take your graduated pipette or syringe and put your base, with or without nicotine, in the vial. Do not fill the vial completely, leave enough room for aromas and additives. As an example, to create 10 ml of liquid, you need to pour about 8 ml of your base.
If your base is nicotine-neutral, you can add one or more boosters to reach the desired dosage. To find out how much booster to choose, keep a simple calculation in mind: (desired nicotine dosage x volume of your base) / nicotine dosage of the booster.
Nothing like an example to clear your mind. Be aware that boosters are commonly sold in 20 mg/ml. So if you want an e-liquid with 3 mg/ml of nicotine in a base of 100 ml, you have to make this calculation: (3×100) / 20 = 15. You therefore need 15 ml of booster charged at 20 mg/ml to acquire a 100 ml base with a nicotine dosage of 3 mg/ml.
Once done, you can then add 1% basic additives such as alcohol or water. This is absolutely not obligatory, these additives will enhance the taste a little more and dilute the rather viscous VG.
Then you can incorporate a few drops of your own aroma. Start with a small amount, which you can later adjust if it seems too small. If you wish, you can add one or more additives to bring freshness, to soften the taste or on the contrary to spice it up.
Close the bottle, shake it for about a minute, and let it rest for a few minutes. Do not hesitate to repeat the operation several times in a row. We advise you to store the bottle away from the light so as not to denature your freshly prepared e-liquid. Do not forget to wash your hands thoroughly to avoid any infection!
Second step: maturation of the e-liquid
This step should not be taken lightly as it will develop the aroma of your e-liquid. There are now two distinct methods for maturing your e-liquid DIY: steeping and breathing. Don't panic, we'll explain!
- Steeping: this method starts the moment you have stored your bottle away from the light. Steeping is necessary for gourmet or "classic" aromas if they have been diluted in alcohol or in the event of a bad smell or unpleasant taste. The process consists of accelerating the maturation process by removing the safety cap from the bottle and pressing the nozzle to expel the air. After performing this manipulation, you can put the cap back on and shake the bottle. It is necessary to perform this technique every day throughout the maturation period.
- Breathing: simpler than steeping, this technique is intended for e-liquids that are too alcoholic or too strong in the mouth, or to increase the maturation of "classic" and "gourmet" liquids. Breathing thus requires removing the safety cap and the spout, before putting the bottle back in its place for one hour. All the alcohol in the base will then evaporate.
La maturation peut être plus ou moins longue, et dépend du type d’arôme que vous avez intégré dans votre mélange. Selon la famille de cet arôme, plusieurs jours de maturation seront à respecter :
Arôme fruité avec un seul parfum : délai de maturation estimé entre 0 et 5 jours.
- Complex fruity aroma, with several flavors: 3 to 7 days are recommended.
- Menthol, spicy, aniseed, vanilla, caffeinated or licorice flavor: wait 1 to 2 weeks.
- Gourmet aroma: you will have to wait 2 to 3 weeks.
- Classic" flavour: at least 2 weeks will be necessary before consuming the liquid.
Once the maturation period has been reached, you can enjoy your e-liquid and appreciate the result of your home made production. Your creative energy and your expectations will have finally paid off!
Frequently Asked Questions on eliquids
Est ce que je peux mélanger les e-liquides ?
Quelle proportion PG/VG dois je choisir pour mon e-liquide ?
Qu’est ce que le sel de nicotine ?
The best selling e liquids
Other e-cigarette tips
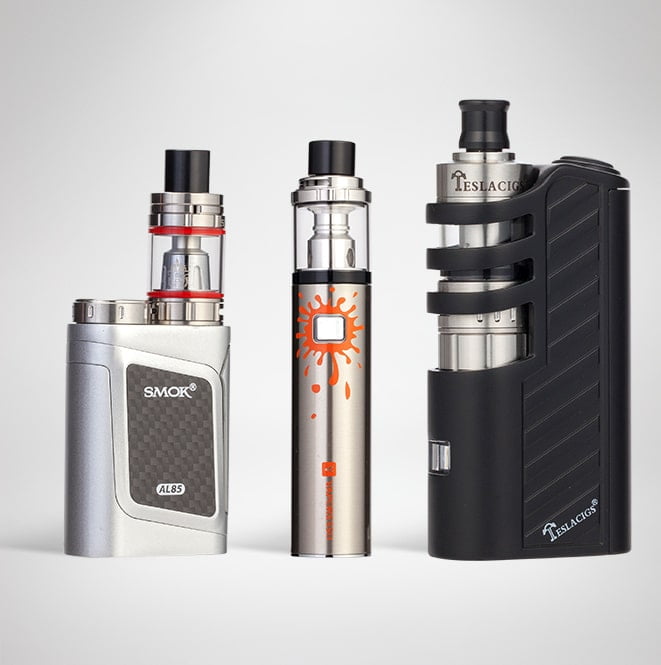
THE E-CIGARETTE
What is the e-cigarette?
The different models
How to choose it well?
THE CLEAROMIZER
What's a clearomizer?
How does it work ?
How do you choose your clearo?
RESISTANCE
What is a resistor?
Choosing a resistor?
Changing the resistance of the clearo
THE E-LIQUID
What is an e-liquid?
How to choose your liquid ?
The origin of the e-liquid

